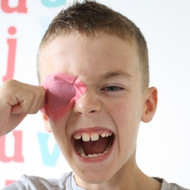
Tips for Removing Adhesive Eye Patches
14th Sep 2021

Patching is NOT always fun – actually, who am I kidding, I don’t think it’s ever really fun for our kiddos. But trying to make it as easy as possible for kids can help them on their patching journey. If you’ve chosen to use adhesive patches for your child ensuring you apply them properly and remove them painlessly can be a big help in getting your kid to comply with the therapy.
In case you missed it, I provided my top tips for applying adhesive patches in a previous blog post. Once you’ve got that down pat, you can try these tips for removal.
Do remember that it can take some time for your child’s skin to get used to patching and some irritation can occur – but if they break out in a huge rash you need to stop patching immediately and ensure they are not allergic to any of the ingredients in the patch you’re using.
So, here are my top tips for removing adhesive patches.
 1. Break it down
All adhesive orthoptic eye patches, regardless of the brand, have an adhesive the sticks the patch to the face. The ingredients in these adhesives can all differ but before you remove the patch, it can make life a lot easier if you break the adhesive down. I’d suggest starting with natural options such as coconut oil, olive oil or water. Simply rub a little around the outside of the patch on the adhesive part of the patch, leave for a few minutes and it should just slide right off.
Non-natural alternatives you can also try are sunscreen (be careful not to get it in their eyes!) and Smith + Nephew Remove Wipes. These wipes cost small fortune so when we used them we would seal them back up to get 3-4 days use from each one. If you want to go down that path, it’s worth having a chat with your local pharmacist to see if they’ll give you a discount for buying a whole box. We were lucky our pharmacist was really lovely and sold them to us at just a little over cost after we told him about Dane’s condition (as an aside, he did the same thing for the anaesthetic Minims drops – what a legend!).
 2. Don’t just rip ‘em off!
Seriously – don’t! I know there are two schools of though for Band-Aid removal – the all in one go and the gently-gently but in the case of eye patches, gently-gently is the go. The skin around the eye is so sensitive that it’s just going to cause damage if you rip them straight off. Obviously kids are likely to rip them off themselves (that pulling off 10 patches a day phase is great fun!) but if you are still in control, just ease them off gently.
 3. Recovery
I mentioned barrier creams in my post about applying adhesive patches but to recap on that – allowing the skin to recover overnight when not patching can be very helpful in the long run. We found a thin layer of Sudocrem was a life saver when Dane’s skin was irritated from patching but you might find another moisturiser even better.
Just remember that some barrier creams will break down Kids Eye Gear adhesive patch adhesives super quickly, so make sure they’re all removed the next day when you go to patch again.
Our goal with our Kids Eye Gear adhesive patches was to design a patch that caused the least amount of irritation for kids’ skin. As I’ve said, everyone’s skin is different so they might not work for everyone – finding that perfect balance of stickiness is no easy feat! Ensuring you are gentle when removing the patch can go a long way in creating a smoother road for your patching journey.
Hopefully these tips will help you manage removing your child’s adhesive eye patch!

